Installing a mechanical seal in a pump: complete guide
Installing a mechanical seal in a pump: complete guide
Mechanical seals are essential components for the proper functioning of industrial pumps, ensuring a seal between rotating and stationary parts and preventing fluid leaks that could compromise the efficiency of the system. Correct assembly is not only a matter of technical precision, but is essential to ensure the durability of the component, reduce maintenance costs, and guarantee the operational safety of the system. Even small errors during installation can cause problems such as premature leaks, accelerated wear of the seal rings, abnormal vibrations, or, in the most serious cases, complete damage to the seal.
With this guide, we at Meccanotecnica Umbra will walk you step by step through the entire process of installing a mechanical seal in a pump, providing detailed instructions, practical advice, and precise guidance on mistakes to avoid in order to ensure a perfect and long-lasting installation.
Before proceeding with the installation of a mechanical seal, it is essential to prepare all the tools and materials needed to perform the operation correctly and professionally. Having everything you need at hand allows you to work accurately, avoid interruptions, and ensure the highest quality installation:
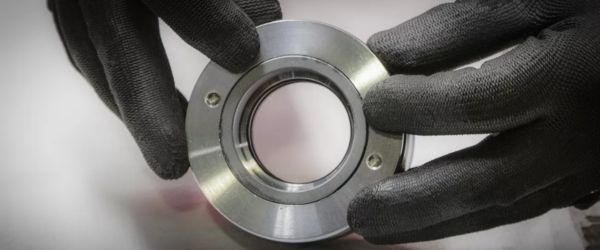
The assembly of the counterface is a critical phase in the installation of the mechanical seal and requires particular attention to ensure the correct functioning of the system. Following a methodical procedure allows you to avoid damage and ensure maximum component life. Before proceeding with assembly, it is necessary to verify that the counterface seat has the correct geometric characteristics. The surface must be smooth and free of sharp edges that could damage the rubber sleeve or ring during insertion. It is essential that there is a beveled inlet to facilitate the positioning of the component.
Using the degreasing solvent, thoroughly clean the counterface housing to completely remove any traces of grease, oil, or machining residues. Next, carefully clean the lapped track using a chamois leather or soft cloth. This surface is extremely delicate, and any scratches or damage can compromise the seal. To facilitate insertion into the seat, moisten the outside of the cap or rubber ring with alcohol or a 5% soap and water solution. Alternatively, you can ask us at Meccanotecnica Umbra to apply a lubricant that allows for completely dry assembly.
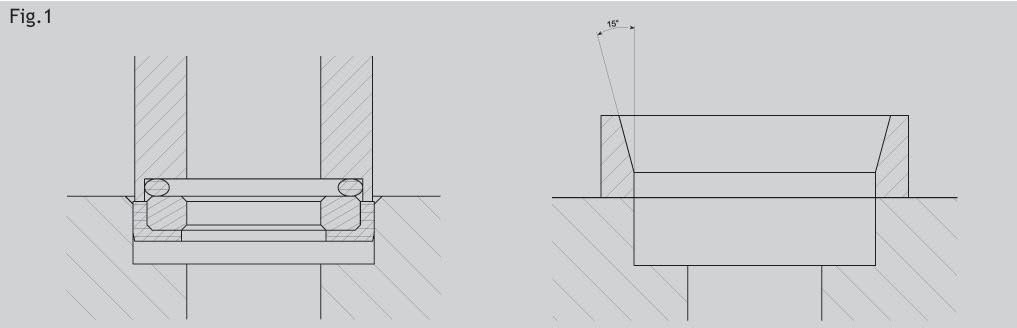
Use a mounting tool similar to the one shown in Fig. 1 to push the counterface evenly into its seat. The tool allows the insertion force to be distributed evenly, preventing deformation or damage. The entry chamfer naturally guides the component into the correct position. If it is not possible to create an entry chamfer on the seat, it is essential to use a conical guide cap as shown in Fig. 2. This accessory creates a gradual ramp that facilitates the entry of the elastomeric cap, protecting it from possible damage during insertion.
Once insertion is complete, visually check that the counterface is fully seated in its housing and that there is no deformation or leakage. The lapped surface must remain perfectly clean and intact, ready for coupling with the rotating seal.
Mounting the seal on the pump shaft requires the same care and precision as mounting the counterface.
The shaft must have characteristics similar to those required for the counterface seat: smooth surface, free of sharp edges and preferably with a chamfered inlet. Before proceeding, thoroughly degrease the area of the shaft involved in the assembly with solvent, removing all traces of oil, grease, or contaminants. Also clean the lapped seal track with suede or a soft cloth, taking the utmost care not to damage this critical surface.
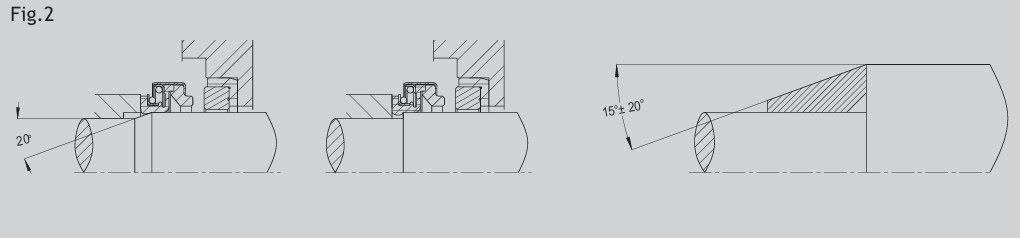
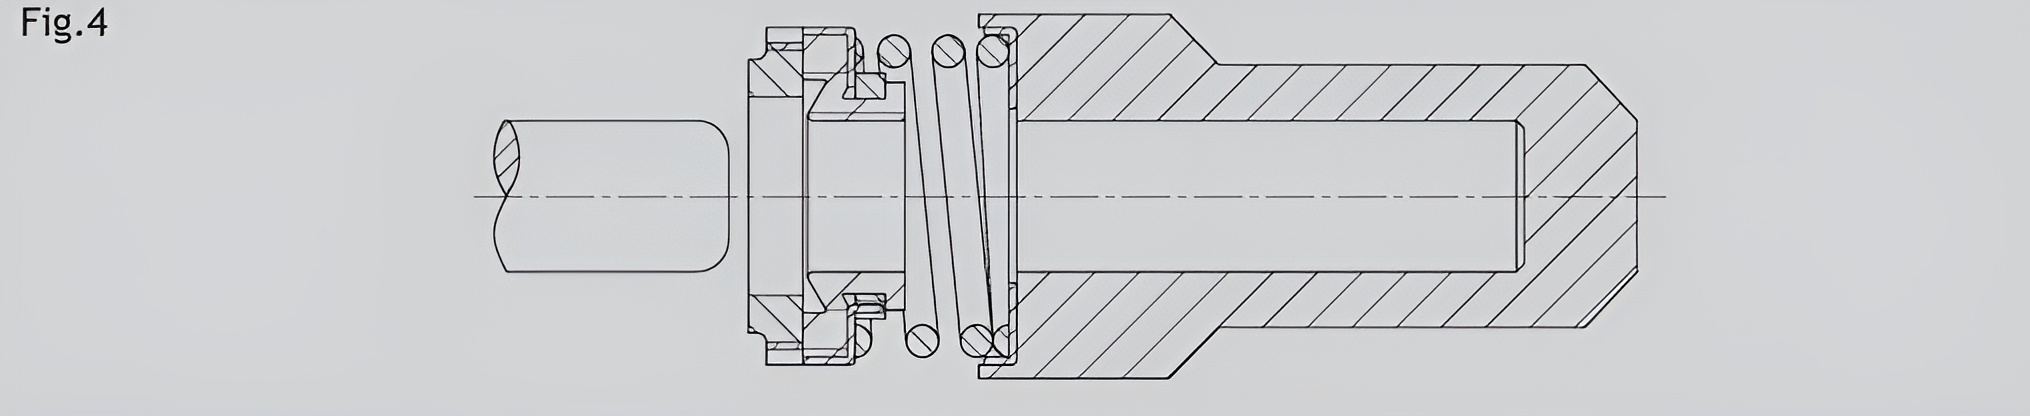
The bevelled inlet on the shaft is of fundamental importance in order to avoid assembly errors. The correct bevel must be between 1.5 and 2.5 mm with an angle of 20°, as shown in Fig. 3. This geometry allows the seal to slide gradually onto the shaft without damaging or folding the elastomeric elements inward, as shown in Fig. 4.
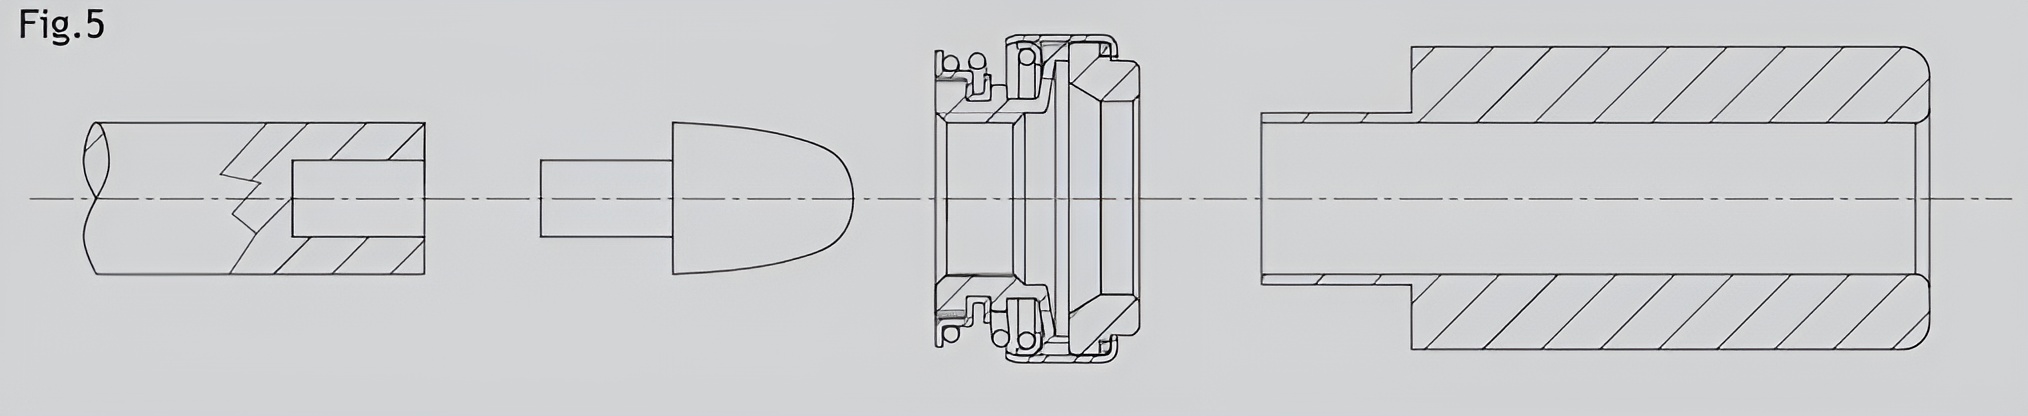
When it is not possible to bevel the shaft, it is essential to use a well-sanded cone during assembly, as shown in Fig. 5. The cone acts as a temporary guide, artificially creating the ramp needed to insert the seal correctly, protecting the elastomeric parts from excessive stress.
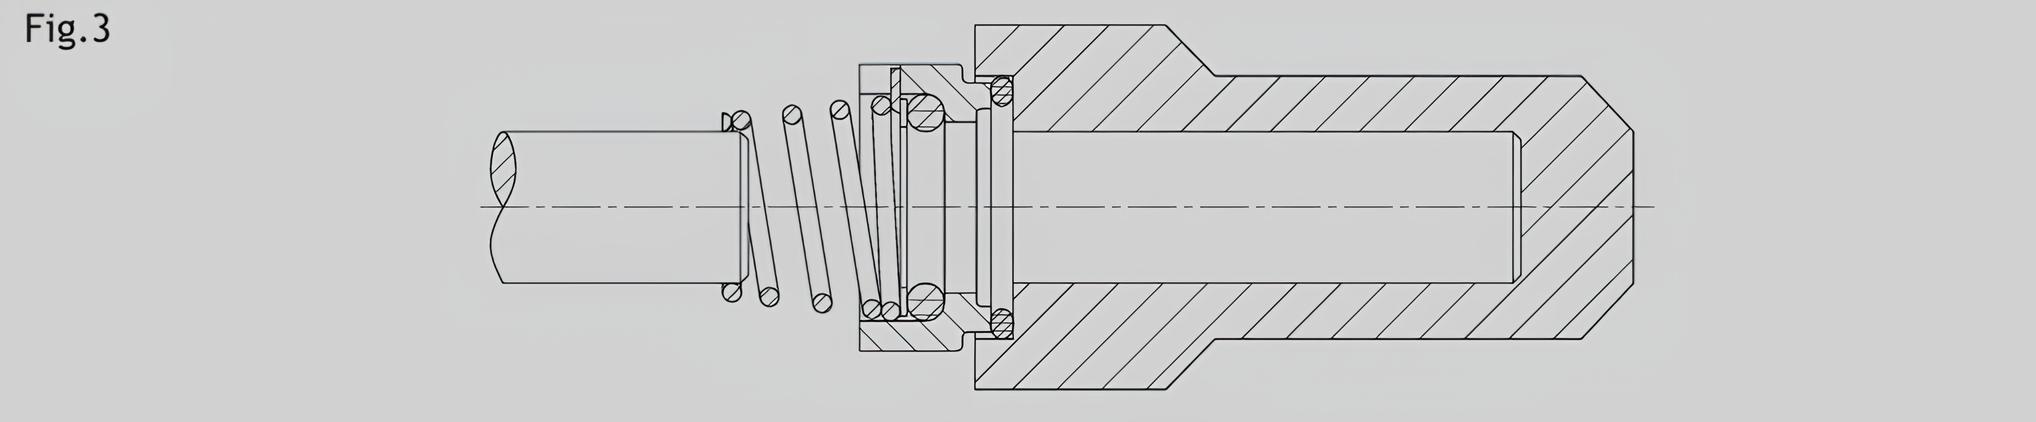
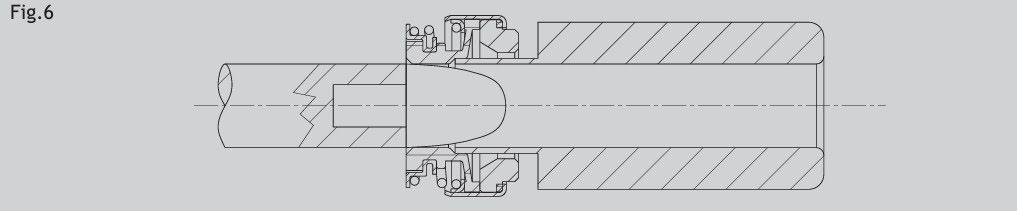
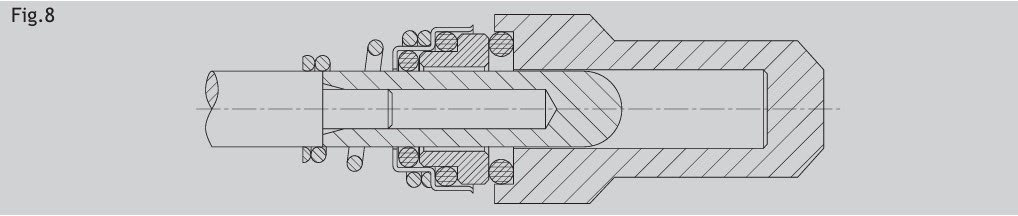
For the final positioning of the seal on the shaft, use specific equipment similar to that shown in Figs. 6, 7, and 8. These tools allow the seal to be pushed into the correct position by applying a uniform and controlled force, avoiding localized pressure that could deform or damage the component.
Once assembly is complete, check that the seal is correctly positioned, that the lapped track is intact and clean, and that there are no signs of damage to the elastomeric elements. The seal is now ready to be coupled with the previously installed mating surface.

When installing a mechanical seal, even minor oversights can seriously compromise the system's operation and cause premature failure. Knowing the most common mistakes allows you to prevent them and ensure correct and long-lasting installation.
The most serious and frequent error concerns the use of unsuitable lubricants. It is strictly forbidden to use oil, grease, or other lubricants to facilitate the insertion of the counterface or seal. These products cause uncontrolled slippage, compromise the adhesion of elastomeric components, and create sealing problems. Use only alcohol or a 5% soap and water solution.
Installation without a beveled inlet is another critical error. As shown in Fig. 4, the absence of a bevel on the shaft causes the elastomeric elements of the seal to fold inward, permanently compromising their functionality. When it is not possible to create a chamfer, it is essential to use a well-smoothed cone (Fig. 5) or a conical guide cap (Fig. 2).
Inadequate cleaning of lapped tracks compromises perfect flatness and grip. Never use abrasive materials or rough cloths: always use suede or specific soft cloths and work with the utmost delicacy.
The use of inadequate or improvised equipment can cause deformation, localized pressure, or breakage of components. Always use the specific equipment shown in Figs. 1, 2, 5, 6, 7, and 8, which ensure uniform distribution of the mounting force.
Finally, mounting on surfaces with sharp edges or burrs can cut or damage the elastomeric elements during insertion. Always check that all surfaces are perfectly smooth and free of defects before proceeding.
Paying attention to these critical aspects ensures professional installation and maximum reliability of the mechanical seal over time.
In conclusion, the correct installation of a mechanical seal is crucial to ensuring optimal performance, preventing premature failure, and ensuring maximum component life. Following the correct procedures and using the appropriate tools makes the difference between a successful installation and costly operational problems.
In this context, component quality also makes a difference. At Meccanotecnica Umbra, we manufacture high-quality mechanical seals according to the highest production standards, designed to ensure reliability and long-lasting performance in various sectors, from chemicals to pharmaceuticals, food to water treatment. Our technical team is always available to provide expert advice, assistance in choosing the most suitable solution, and support at every stage of assembly and maintenance. For more information, technical assistance, or any questions about the assembly of our mechanical seals, please contact us.
MeccanotecnicaUSA, inc.
Seguin Rd. Suite F - Pharr
TX 78577 - U.S.
Phone: 01 956 782 2400
SALES OFFICE
41650 Gardenbrook Road, Suite #110
Novi, MI 48375
Phone: 248-347-0606 ext. 224
Email: usa@mtu-group.com
Privacy / Cookie policy
F.A.Q.
© 2026 - Meccanotecnica Umbra S.p.A.
Designed by Co.Mo.Do Comunicare Moltiplica Doveri
Developed by NUR Digital Marketing
